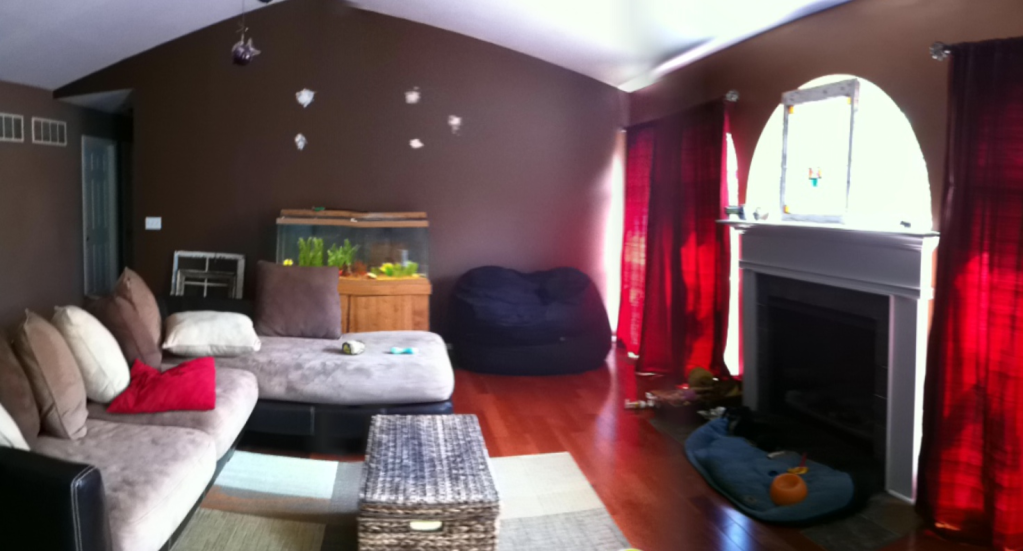
The first thing to know about distressing a wall is that, once you do it, one of your walls will be essentially destroyed. If you ever want to change that wall, or paint it, or need to sell, or the rapture is here and you have to split... you can change the color on top but the texture ain't goin' anywhere. Your wall will look like a crumbling 100 year old wall in the end, which is sweet, but it's a commitment. Just my warning label for whatever it's worth. Also, before I start credit must be given to Reclaimed Home's blog. Their process was what I followed, and though they give a good base of what to do there are a lot of grey areas. I'm just filling is on the areas that we needed clarification on, and as we figured out along the way. There were a few times we were all , wait, what the fuck do we do now?
The colors I used - from least shown to most shown
Gold
Blue
Light Grey
Dark Grey
White and tinted Joint Compound
Tools you'll need
Paint
Crackle
Joint Compound
Craft Paper
Brushes (all of the color was hand brushed on)
Trowel and bucket
Blankets / drop cloth to put on floor
Tools you'll need
Paint
Crackle
Joint Compound
Craft Paper
Brushes (all of the color was hand brushed on)
Trowel and bucket
Blankets / drop cloth to put on floor
Ladder
Step One
The first thing you do is get joint compound. We bought a five gallon bucket for the wall which is about 20 ft by 15 ft. I've never actually measured it. I'm just eyeballing it. The joint compound we purchased was Sheetrock All Purpose Lightweight Joint Compound. No specific reason other than that's what they carried at the store. This is a bright, primer white. You get a trowel and spread the joint compound all over your wall.
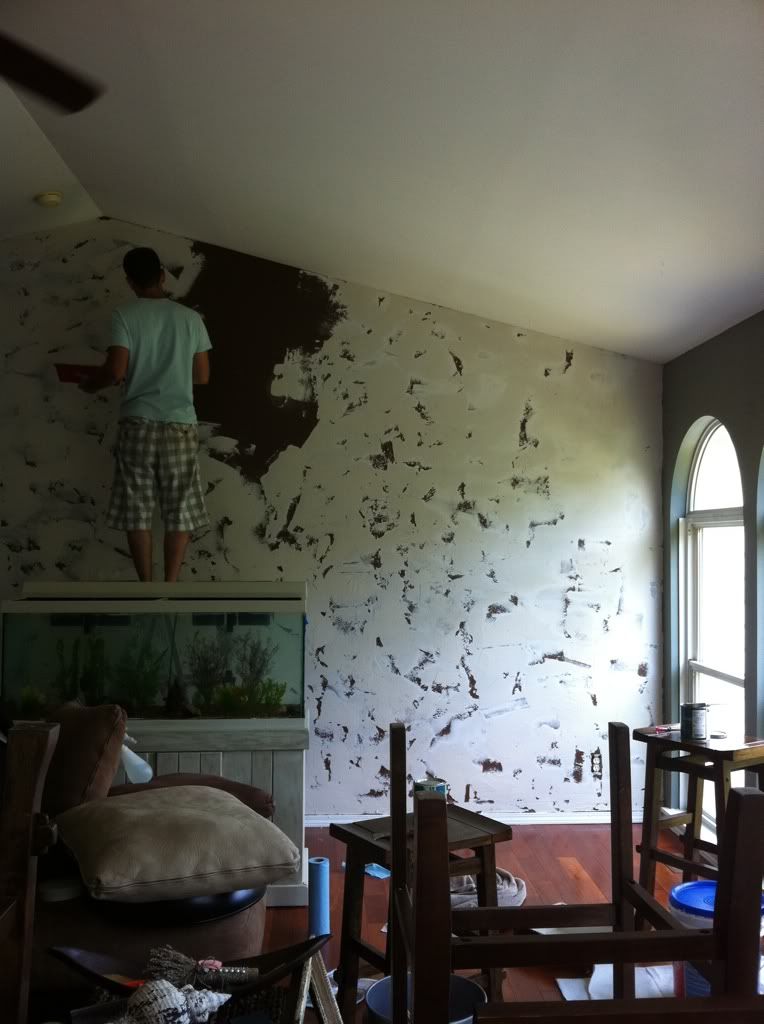
You do not want this smooth and pretty. You want it patchy, thicker in some areas, and places where it's missing completely. You'll let this dry. Took about 4 hours with a fan on it.
Something I wish I would have done differently - I didn't realize that you would see this layer of joint compound. When you rip through to get your distressed look at the end, it will pull straight down to the base coat in some places. For me that was the dark brown that was previously on the wall, and the white joint compound. I wish I had pulled half of the compound out and tinted it a grey color before putting it on the wall. It would have added a bit more depth.
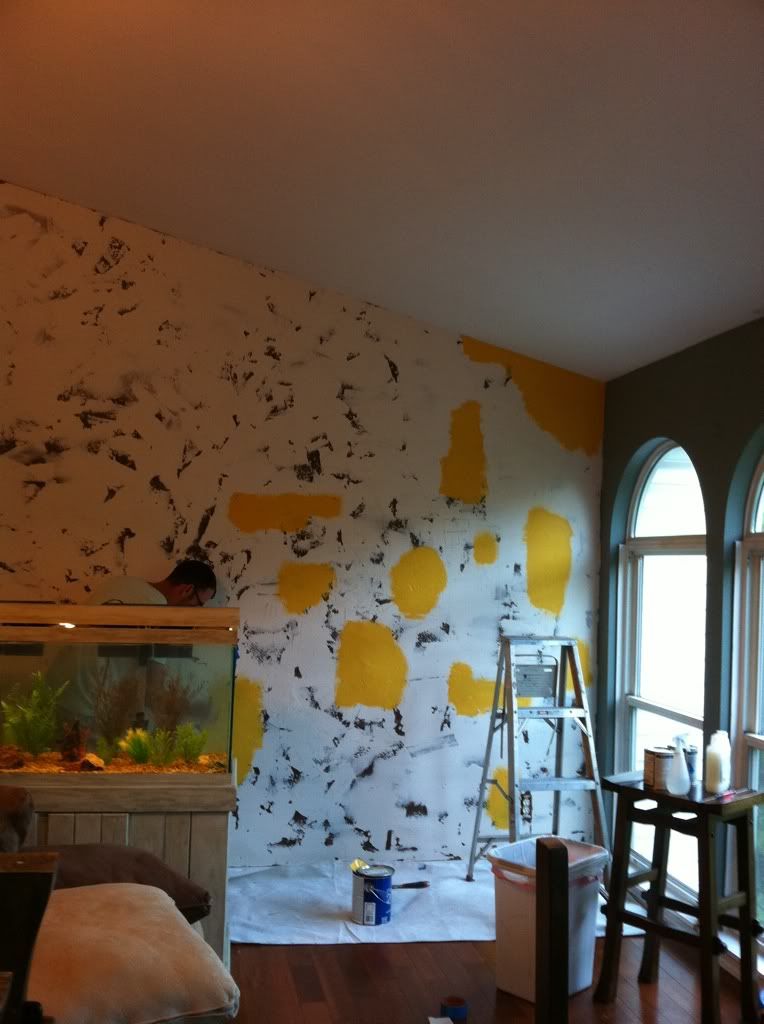
Step Two
After the joint compound dries completely add the color you want to see the least on your wall. For me this was a gold. Depending on your color pallet, this will be different. Put it up patchy and in no random order. Make sure your spots aren't just linear which is something that we started doing at first. Make some of them more oval and oblong.
Step Three
Apply weathered crackle to the top of the yellow color in random places. I used a quart of Valspar weathered crackle for the next handful of steps where you add color, dry, add crackle, dry.... (We used two quarts for the whole wall). You'll want to cover most of the yellow with it, but it's not an exact science. Leave a some areas without it. You'll do this every time you put a new color on top of another color. Let this dry for whatever time the package says. Ours was an hour. We had a fan on it so we cheated a bit with the time. I'm not condoning cheating.
Step Four
Next we covered most of the wall in the lighter grey. You can see we covered a good portion of the yellow up.
You can see how the overlapping colors with the crackle between them will start to, well, crackle. It's pretty rad.
Step Five
Add more crackle on top of the grey in random spots. Let dry.
Step Six
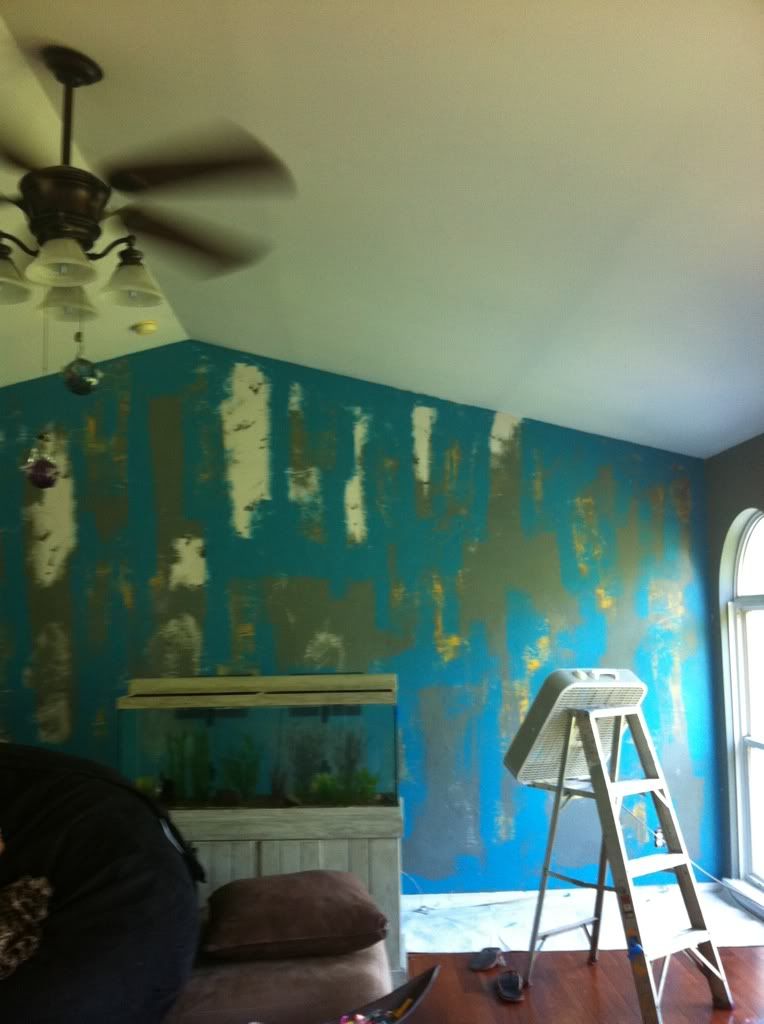
Add the color you want to see the second most of. For us, this was a blue. We applied this in the same patchy way we put the yellow on the wall. Let it dry.
Step Seven
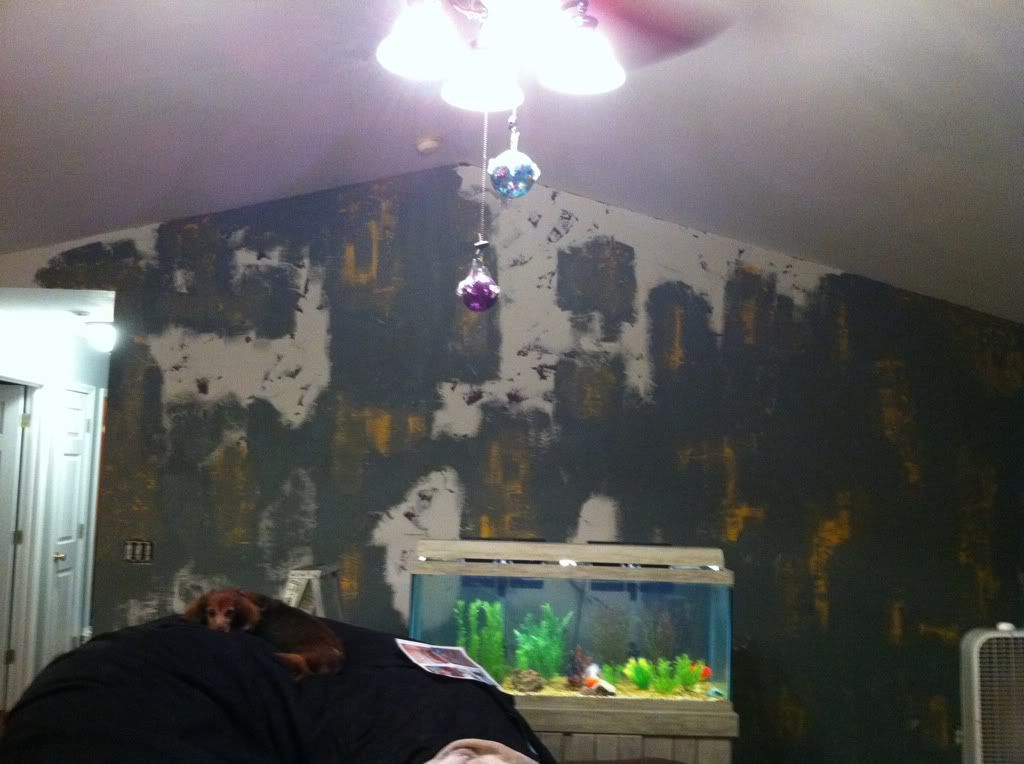
Add crackle on top of the blue. Let it dry. Then we added a darker grey on top of the blue, leaving a bit of it hanging out. This will crackle in the same way that the yellow did. By this point most of your wall should be covered. You can keep doing this as many times as you would like, and with as many different colors as you like. There is no rhyme or reason to it. At this time we've used the first quart of crackle.
Step Eight
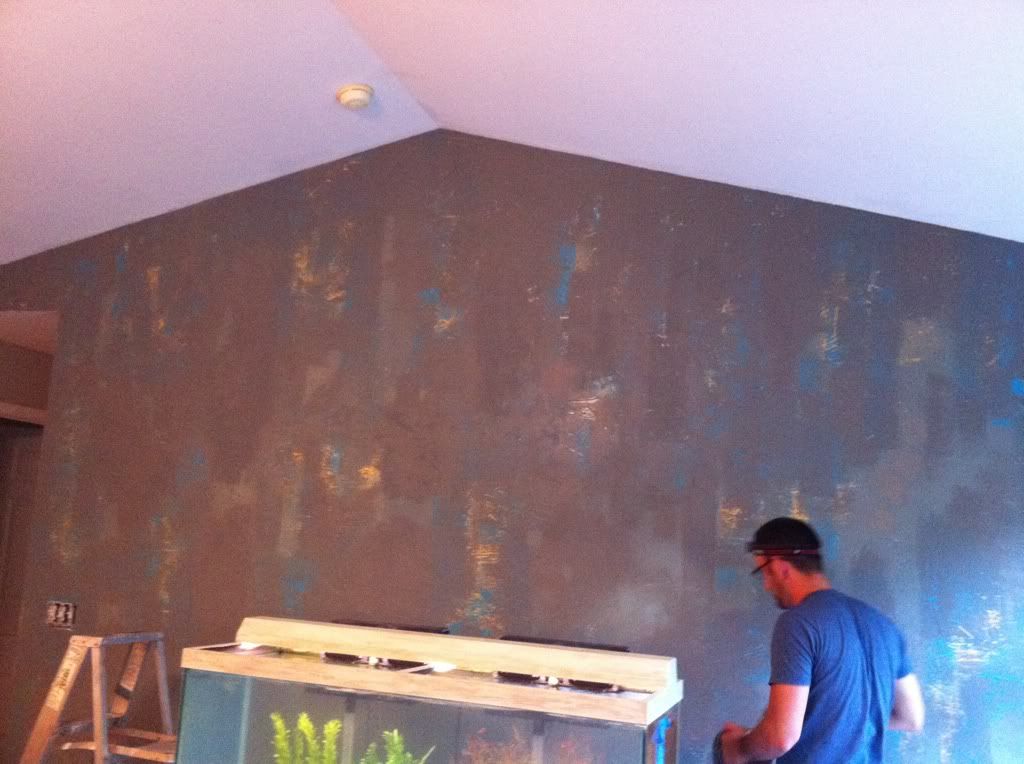
Put crackle on top of most of the wall. This will cause the joint compound you're about to put back onto it to crackle, so don't be too skimpy on it. We used all of the second quart of crackle on this step. Let it dry.
Step Nine
Here is where things are the trickiest, but it's not that terrible. Stick with me. We tinted the joint compound with the darker grey color. Now you want to trowel on the compound into small areas.
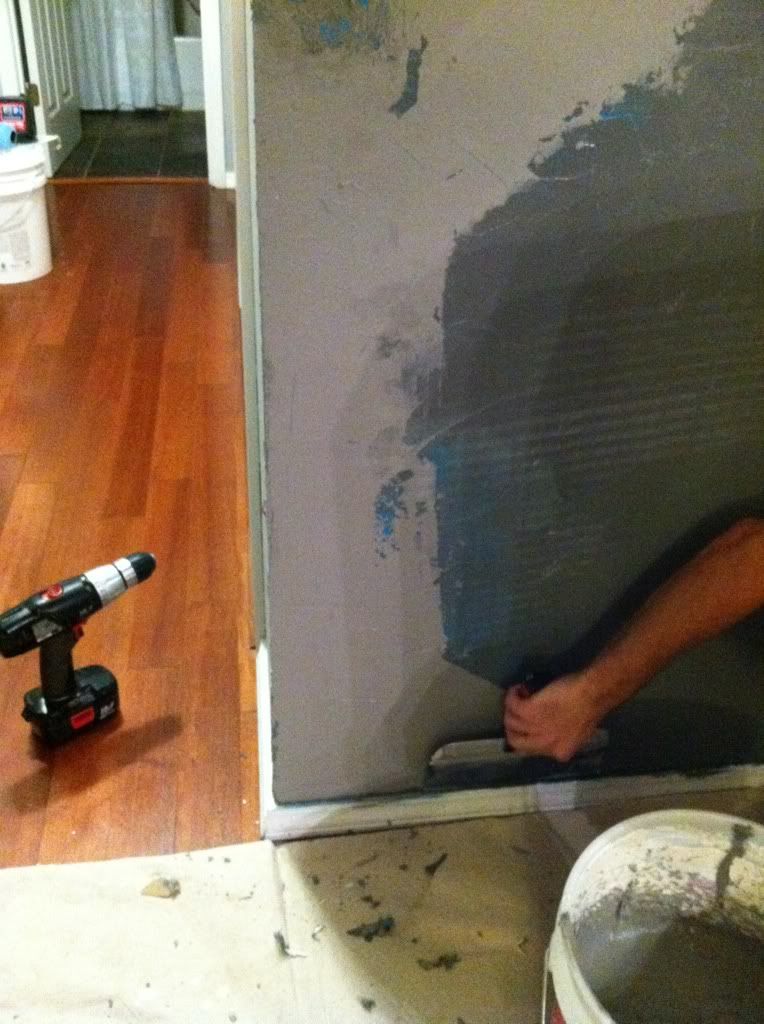
Add craft paper ontop of the wet compound and let it almost set. Craft paper is the same thing as brown wrapping paper. I got mine from the paint store.You'll press this into the wall and help smooth it out. The pressing will really make it look like a plaster wall. You can press harder in some areas and lighter in others. You'll get the hang of it. You can't mess it up.
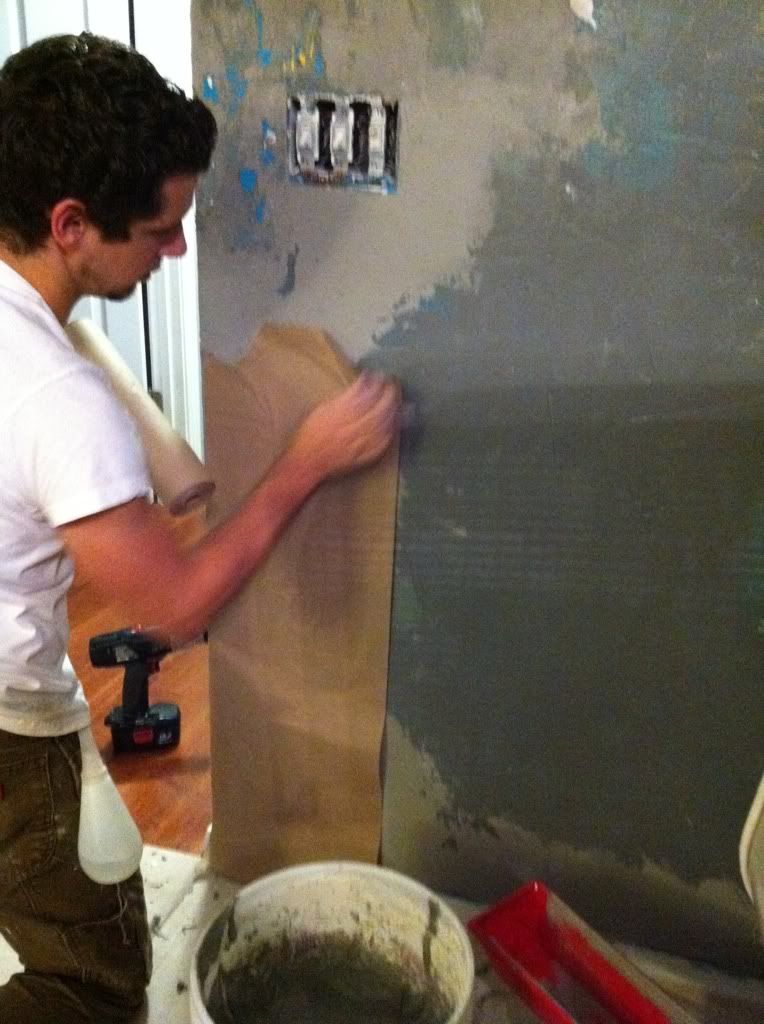
Step Ten
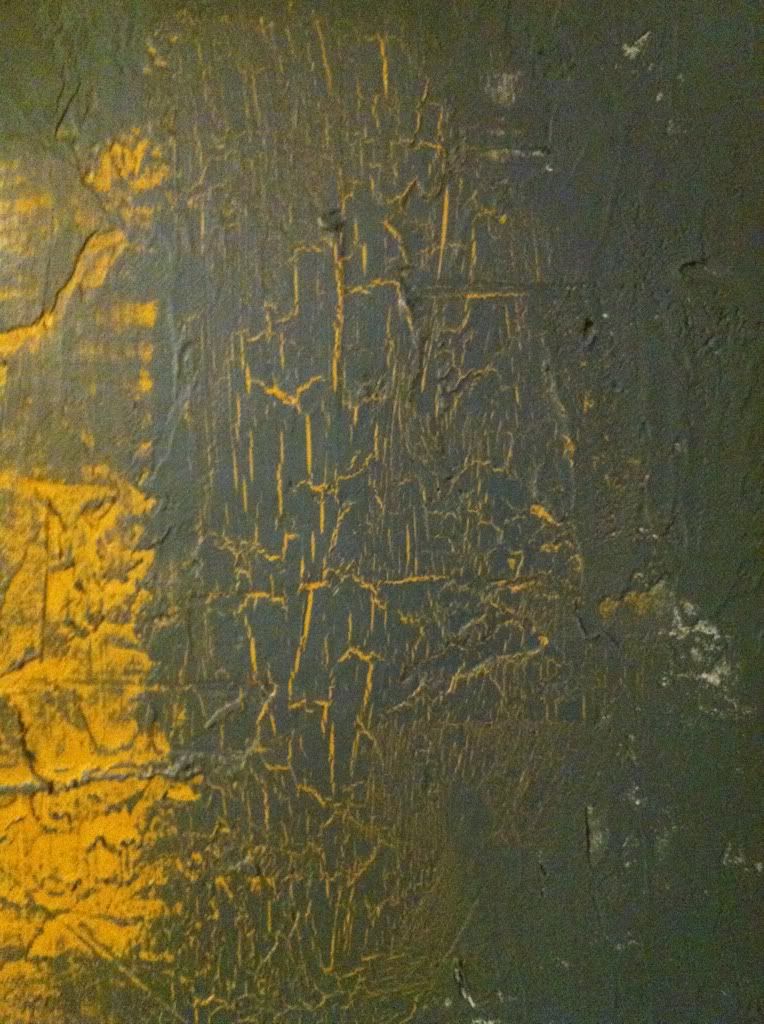
This was the hardest part. After it sets just enough you'll want to pull the craft paper off the wall. It's hard to find that sweet spot where the compound has set enough, but not too much. If you pull too soon the paper will pull off and the compound will stay on and you wont see any of the color underneath. If you pull too late the paper will dry to the compound. We had to play around to figure it out, and you'll have to do the same. We had a squirt bottle to mist the walls in case it got too dry, and used our trust old fan as well. When you rip off the paper you'll start to see your texture and bottom colors pull through.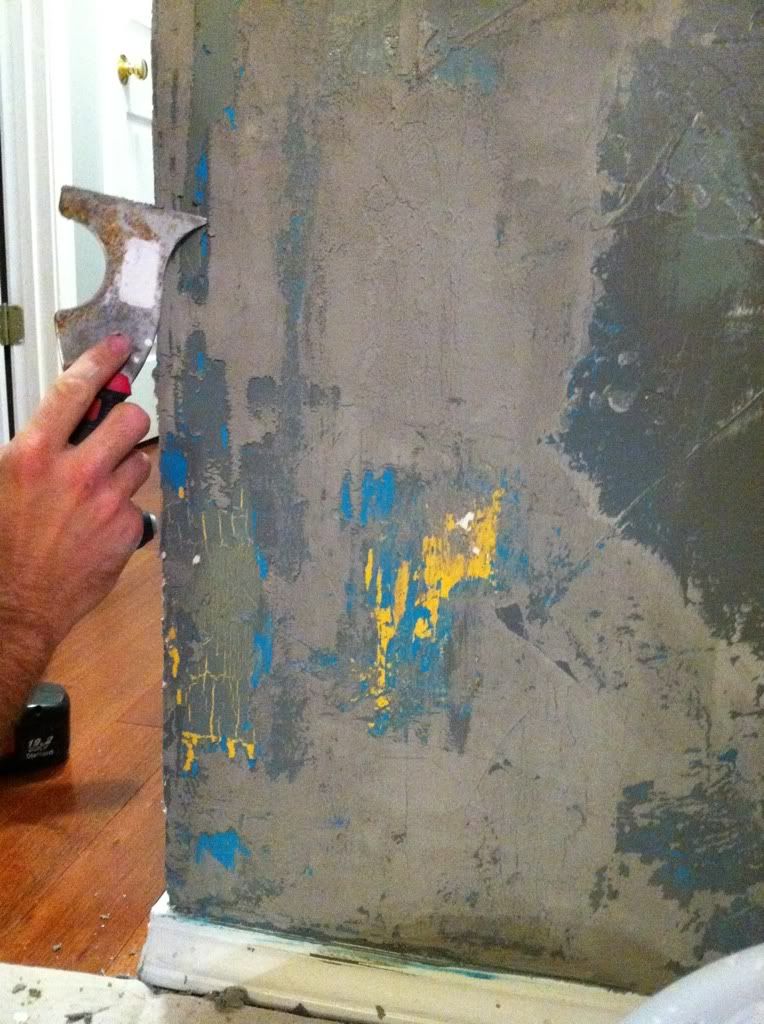
We used that little thingymabob tool to gently pull off any additional layers, and make more color pull through.This is up to you how you want it to look.
You can see in these pictures how all of the colors pull through. The light/dark greys, yellow and blue. Even the white from the first layer of joint compound and the original wall.
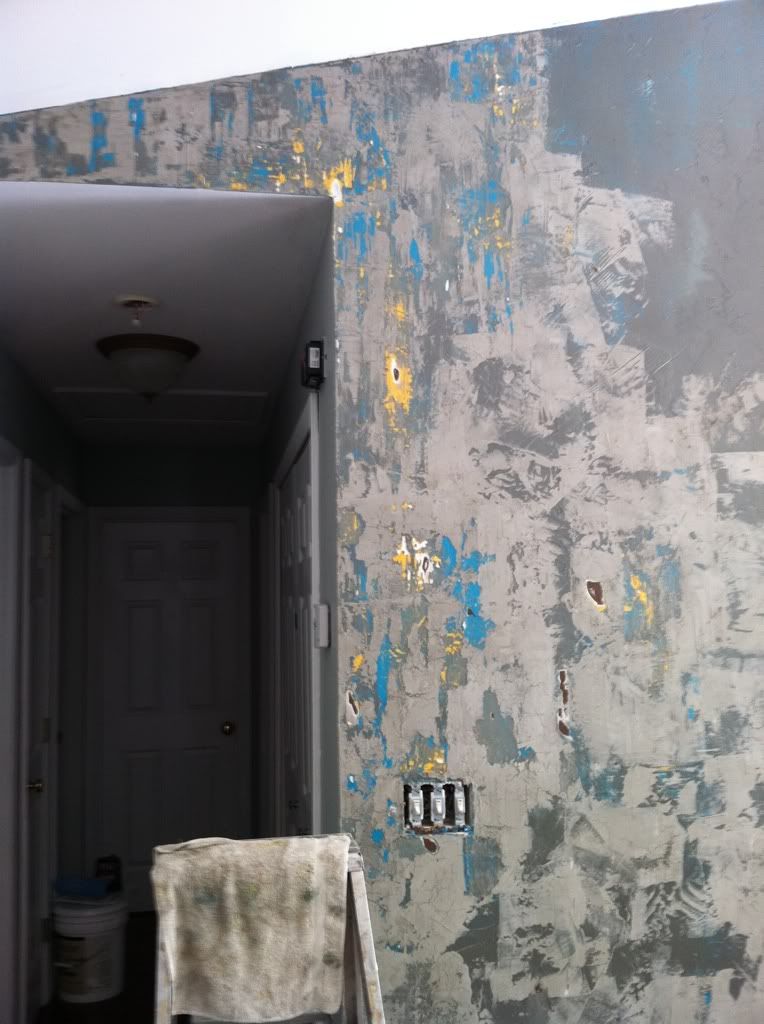
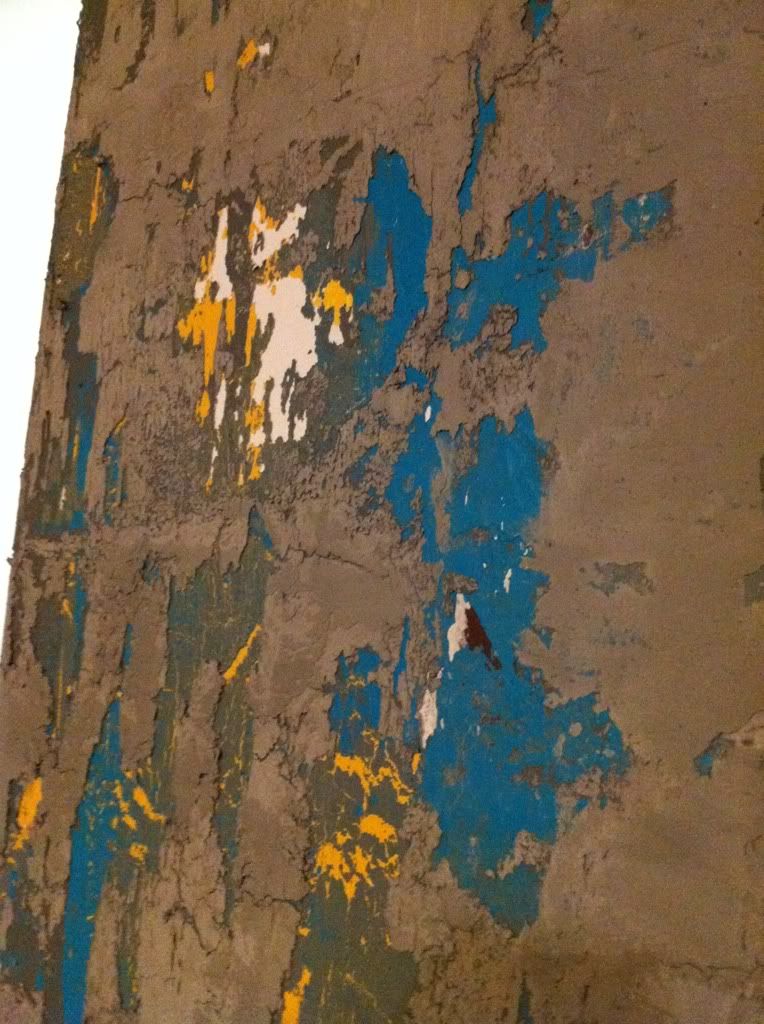
Here is a closer view of the texture. You can see in this last picture what color the joint compound was wet, and in the picture before the lighter grey that it dried. I like the darker color, so we will be going back in and darkening up some of the dried joint compound with stain.
We're not finished yet, but I'm loving the way it's turning out thus far. It's been a hell of a lot of work for one wall, but it's going to be so unique when we're finished. Manchild and the Cowboy are ready to kill me, I'm sure, and I can't say I blame them. More to come as we finish!